본 연구의 목표는 큐브셋을 통해 우주 시스템을 이해하고 창의 임무 설계, 요구 조건 분석, 그리고 시스템 기본 설계 및 제작을 통해 학교에서 배워온 지식을 실제 응용하여 공학과 과학의 관계와 차이를 배우고 관련 전공에 대한 흥미를 유발하기 위함에 있다. 다양한 환경센서를 성층권에서 측정하는데 목적이 있다.
목차
CubeSat - MicroSD Card Breakout Board
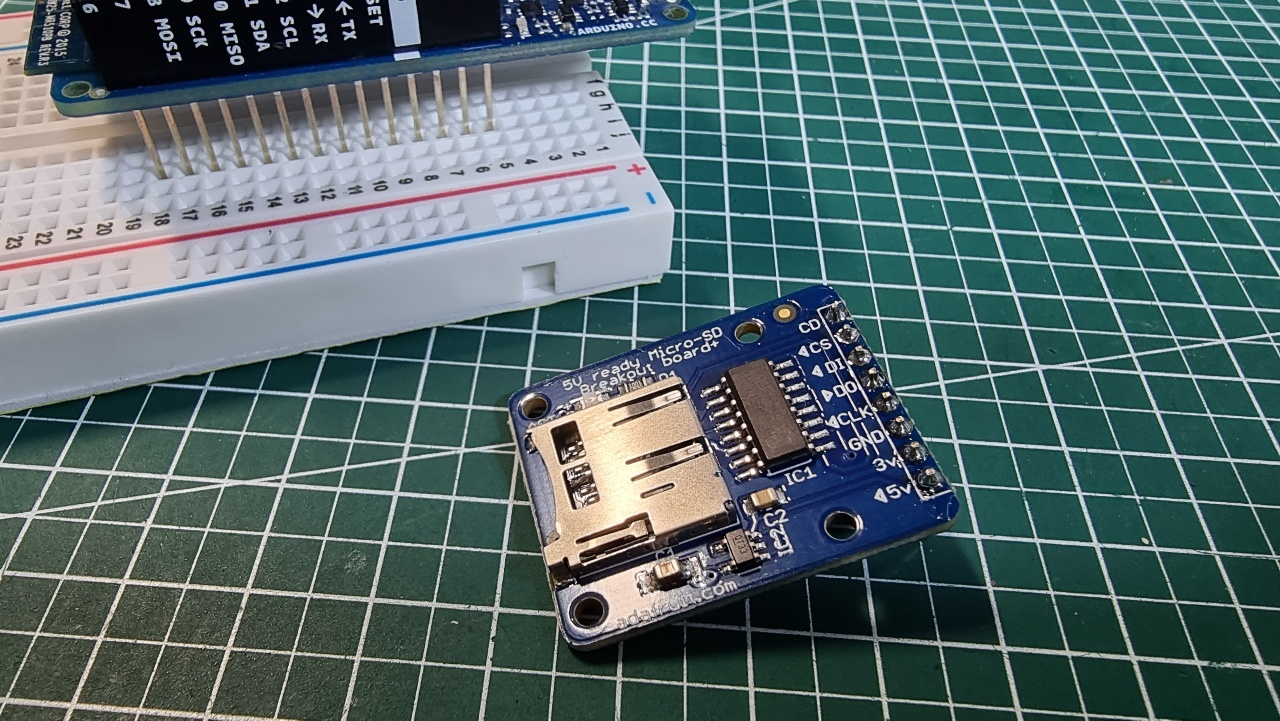
CubeSat - MicroSD Card Breakout Board
단순한 브레이크아웃 보드가 아닌 이 microSD 어댑터는 사용 편의성을 위해 설계되었다. 마이크로 SD 브레이크아웃 보드는 SPI 인터페이스를 사용하여 마이크로 SD 카드를 마이크로컨트롤러에 연결할 수 있는 소형 폼 팩터 보드이다.
Beakout Boards / Storage / MicroSD card breakout board+
MicroSD card breakout board+
Not just a simple breakout board, this microSD adapter goes the extra mile - designed for ease of use.Onboard 5v->3v regulator provides 150mA for power-hungry cards3v level shifting means ...
www.adafruit.com
Product Information/Technical Specifications
Micro SD Card Breakout Board Tutorial
If you have a project with any audio, video, graphics, data logging, etc in it, you'll find that having a removable storage option is essential. Most microcontrollers have extremely limited built-in storage. For example, even the Arduino Mega chip (the Atm
learn.adafruit.com
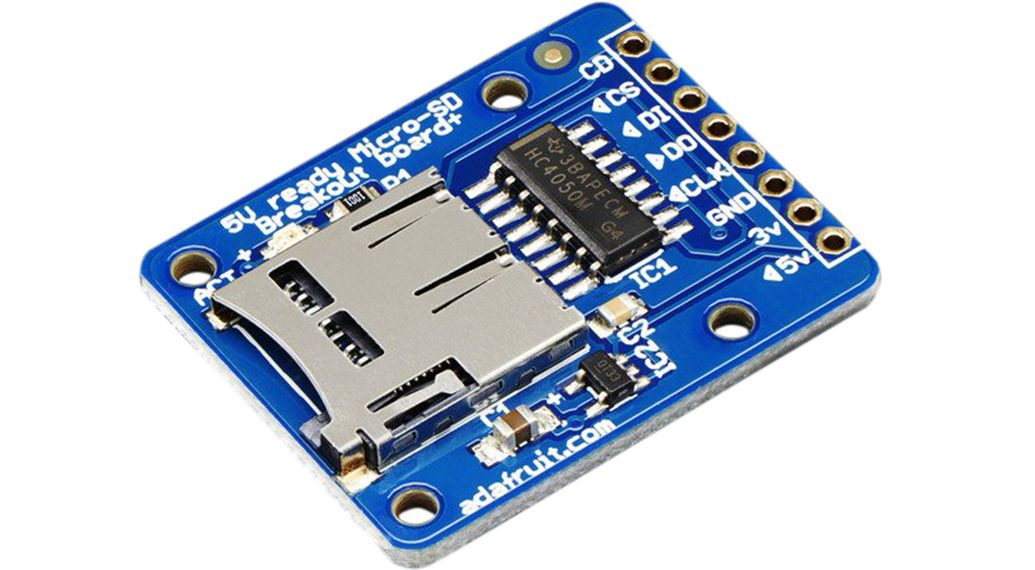
MicroSD Card Breakout board
단순한 브레이크아웃 보드가 아닌 이 microSD 어댑터는 사용 편의성을 위해 설계되었다.
* 온보드 5v->3v 레귤레이터는 전력 소모가 많은 카드에 150mA를 제공한다.
* 3v 레벨 시프팅은 3v 또는 5v 시스템에서 쉽게 사용할 수 있음을 의미한다.
* 저항이 아닌 적절한 레벨 시프팅 칩을 사용한다. 문제가 적고 읽기/쓰기 액세스가 더 빠르다.
* 4개의 #2 장착 구멍
* 카드가 있는 푸시-푸시 소켓이 PCB 가장자리에 약간 있으므로 삽입 및 제거가 용이하다.
* 0.1" 헤더(부착되지 않음)와 함께 제공되므로 브레드보드에 넣거나 와이어를 사용할 수 있다.
* Adafruit 공장에서 테스트 및 조립
* 수많은 예제 코드와 배선 다이어그램이 있는 Arduino와 잘 작동한다.
동작 원리
* 3개 또는 4개의 디지털 핀을 사용하여 2Gb 이상의 스토리지를 읽고 쓸 수 있다
* SD 카드를 읽거나 쓸 때 활동 LED가 켜진다.
MicroSD Card Breakout board 구입하기
[MicroSD Card Breakout board]는 알리익스프레스, 네이버 쇼핑몰, 아마존 등에서 센서를 구입할 수 있다

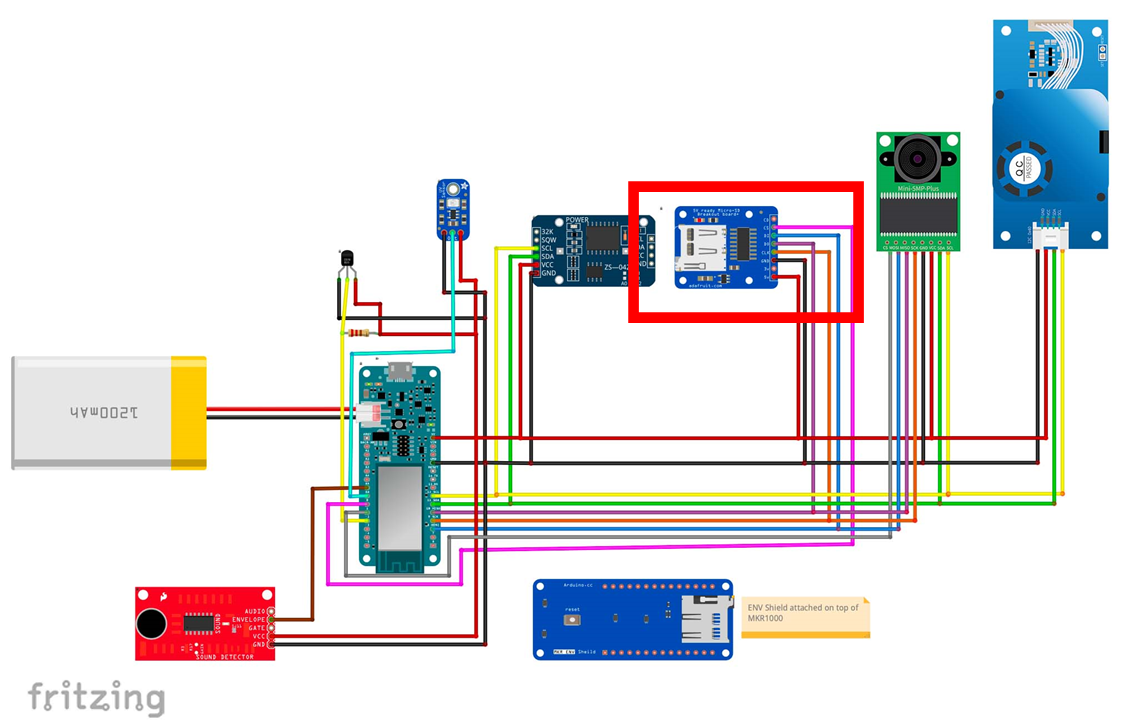
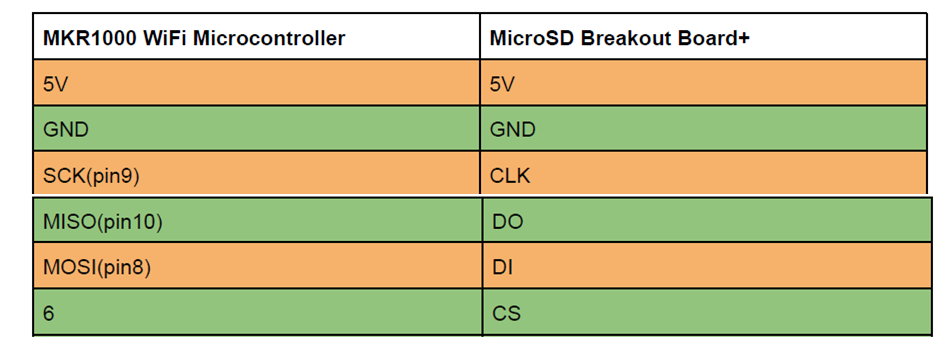
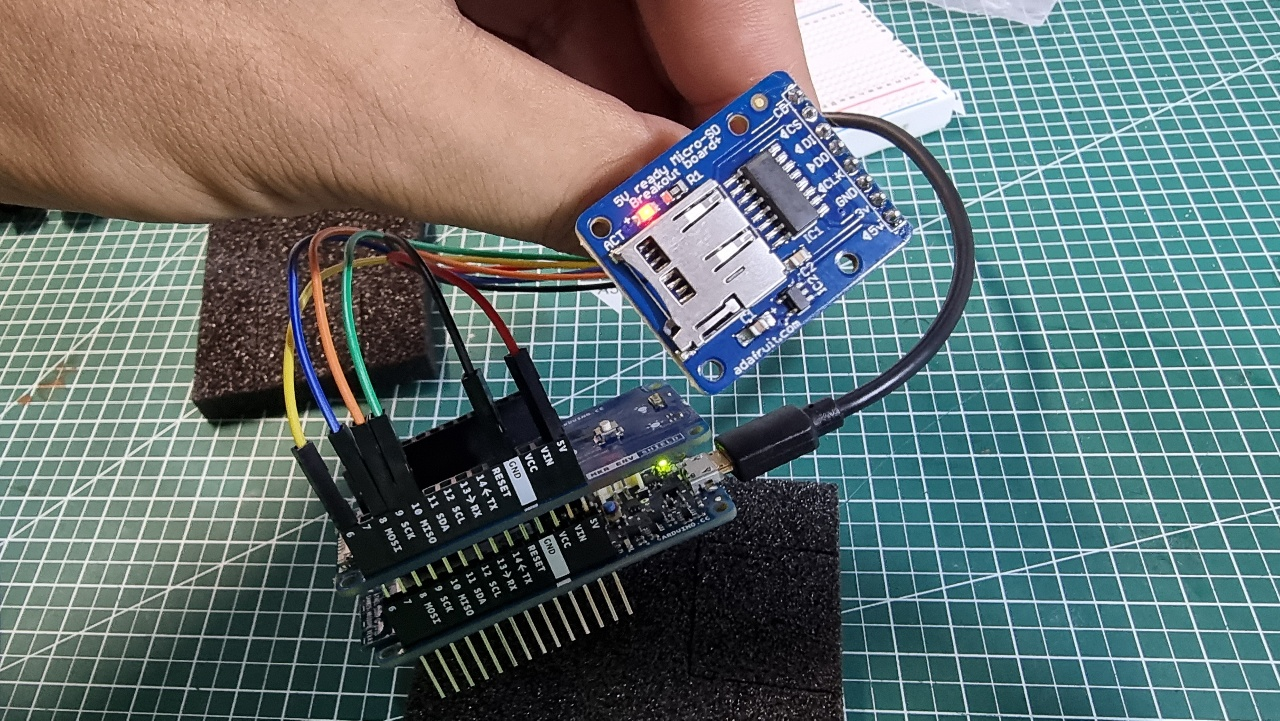
MicroSD Card Breakout board 하드웨어 연결
다음과 같이 MicroSD Card Breakout board를 연결할 수 있다. Arduino와 함께 사용하려면 GND 를 접지, 5V 에서 5V, CLK 를 핀 13, DO 를 핀 12, DI 를 핀 11, CS 를 핀 10에 연결한다.. 그런 다음 FAT 및 FAT32를 지원하는 Arduino IDE의 SD 라이브러리를 사용할 수 있다.

MicroSD Card Breakout board 라이브러리
라이브러리는 추가 설치 없이 기본적으로 제공되고 있다.

MicroSD Card Breakout board 소프트웨어 코딩
하드웨어 연결이 완료되면, 아두이노 IDE를 이용해 아두이노 센서 소스코드를 코딩할 수 있다.
/*
  SD card test

  This example shows how use the utility libraries on which the'
  SD library is based in order to get info about your SD card.
  Very useful for testing a card when you're not sure whether its working or not.

  The circuit:
    SD card attached to SPI bus as follows:
 ** MOSI - pin 11 on Arduino Uno/Duemilanove/Diecimila
 ** MISO - pin 12 on Arduino Uno/Duemilanove/Diecimila
 ** CLK - pin 13 on Arduino Uno/Duemilanove/Diecimila
 ** CS - depends on your SD card shield or module.
 		Pin 4 used here for consistency with other Arduino examples


  created  28 Mar 2011
  by Limor Fried
  modified 9 Apr 2012
  by Tom Igoe
*/
// include the SD library:
#include <SPI.h>
#include <SD.h>

// set up variables using the SD utility library functions:
Sd2Card card;
SdVolume volume;
SdFile root;

// change this to match your SD shield or module;
// Arduino Ethernet shield: pin 4
// Adafruit SD shields and modules: pin 10
// Sparkfun SD shield: pin 8
// MKRZero SD: SDCARD_SS_PIN
const int chipSelect = 6;

void setup() {
  // Open serial communications and wait for port to open:
  Serial.begin(9600);
  while (!Serial) {
    ; // wait for serial port to connect. Needed for native USB port only
  }


  Serial.print("\nInitializing SD card...");

  // we'll use the initialization code from the utility libraries
  // since we're just testing if the card is working!
  if (!card.init(SPI_HALF_SPEED, chipSelect)) {
    Serial.println("initialization failed. Things to check:");
    Serial.println("* is a card inserted?");
    Serial.println("* is your wiring correct?");
    Serial.println("* did you change the chipSelect pin to match your shield or module?");
    while (1);
  } else {
    Serial.println("Wiring is correct and a card is present.");
  }

  // print the type of card
  Serial.println();
  Serial.print("Card type:         ");
  switch (card.type()) {
    case SD_CARD_TYPE_SD1:
      Serial.println("SD1");
      break;
    case SD_CARD_TYPE_SD2:
      Serial.println("SD2");
      break;
    case SD_CARD_TYPE_SDHC:
      Serial.println("SDHC");
      break;
    default:
      Serial.println("Unknown");
  }

  // Now we will try to open the 'volume'/'partition' - it should be FAT16 or FAT32
  if (!volume.init(card)) {
    Serial.println("Could not find FAT16/FAT32 partition.\nMake sure you've formatted the card");
    while (1);
  }

  Serial.print("Clusters:          ");
  Serial.println(volume.clusterCount());
  Serial.print("Blocks x Cluster:  ");
  Serial.println(volume.blocksPerCluster());

  Serial.print("Total Blocks:      ");
  Serial.println(volume.blocksPerCluster() * volume.clusterCount());
  Serial.println();

  // print the type and size of the first FAT-type volume
  uint32_t volumesize;
  Serial.print("Volume type is:    FAT");
  Serial.println(volume.fatType(), DEC);

  volumesize = volume.blocksPerCluster();    // clusters are collections of blocks
  volumesize *= volume.clusterCount();       // we'll have a lot of clusters
  volumesize /= 2;                           // SD card blocks are always 512 bytes (2 blocks are 1KB)
  Serial.print("Volume size (Kb):  ");
  Serial.println(volumesize);
  Serial.print("Volume size (Mb):  ");
  volumesize /= 1024;
  Serial.println(volumesize);
  Serial.print("Volume size (Gb):  ");
  Serial.println((float)volumesize / 1024.0);

  Serial.println("\nFiles found on the card (name, date and size in bytes): ");
  root.openRoot(volume);

  // list all files in the card with date and size
  root.ls(LS_R | LS_DATE | LS_SIZE);
}

void loop(void) {
}
Setting Up the MicroSD Card Breakout Board+
하드웨어 연결, 소프트웨어 코딩이 완료되면 다음과 같이 동작 화면을 확인할 수 있다.
------------------------------------------------------
개발환경 : WINDOWS 10
아두이노 IDE : 1.8.13
------------------------------------------------------
01. Arduino IDE에서 파일 -> 예제 -> SD -> CardInfo로 이동한다.
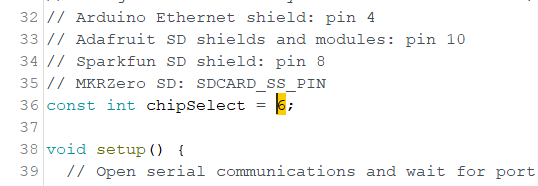
02. 다음 코드 줄을 찾는다. ( void setup() 바로 전)
4를 6으로 변경한다.(CS(ChipSelect)를 MKR1000의 핀 6에 연결)
03. MKR1000을 컴퓨터에 연결하고 MKR1000의 녹색 표시등과 Micro SD 보드의 빨간색 표시등이 켜져 있는지 확인한다.
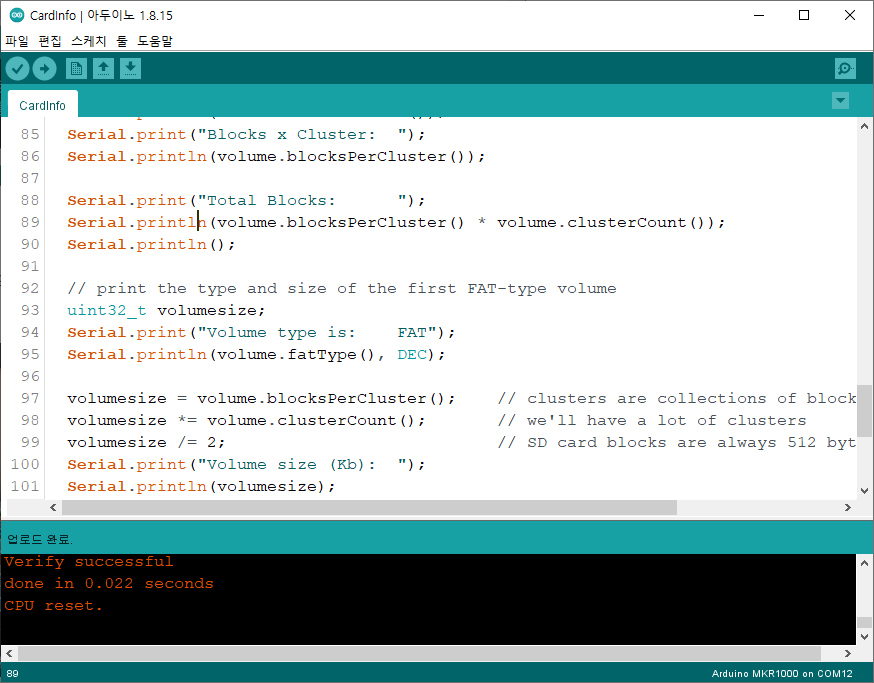
04 아두이노 코드를 복사해서 넣고, 컴파일을 한다.

05 . 업로드 한다.
04. 이 프로그램의 Serial.begin(9600) 때문에 직렬 모니터 전송 속도가 9600인지 다시 확인한다.
카드를 넣지 않으면 다음과 같은 에러가 발생한다.

* 카드 인식 문제가 생긴다면, 마이크로 SD 카드가 슬롯에 올바르게 끼워졌는지 확인해야 한다.
* MKR1000에서 microUSB 코드를 분리했다가 다시 연결해 본다. (코드가 업로드되면 빨간색 표시등이 계속 켜져 있지 않을 수 있다).
* 배선을 확인하고 각 연결이 제자리에 단단히 고정되어 있는지 확인한다.
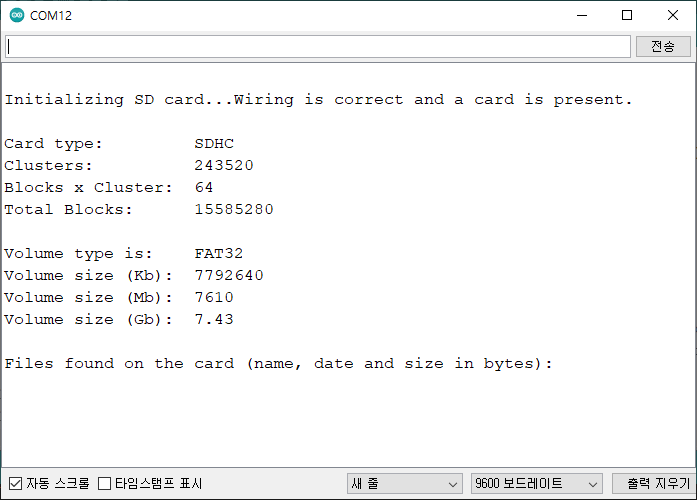
05. 프로그램을 업로드한 후 시리얼 모니터를 다시 확인한다. 카드가 올바르게 삽입되고 보드가 올바르게 배선되면 카드에 대한 정보가 표시된다.

Writing to the MicroSD Card
데이터를 sd카드에 쓰는 동작을 수행한다.
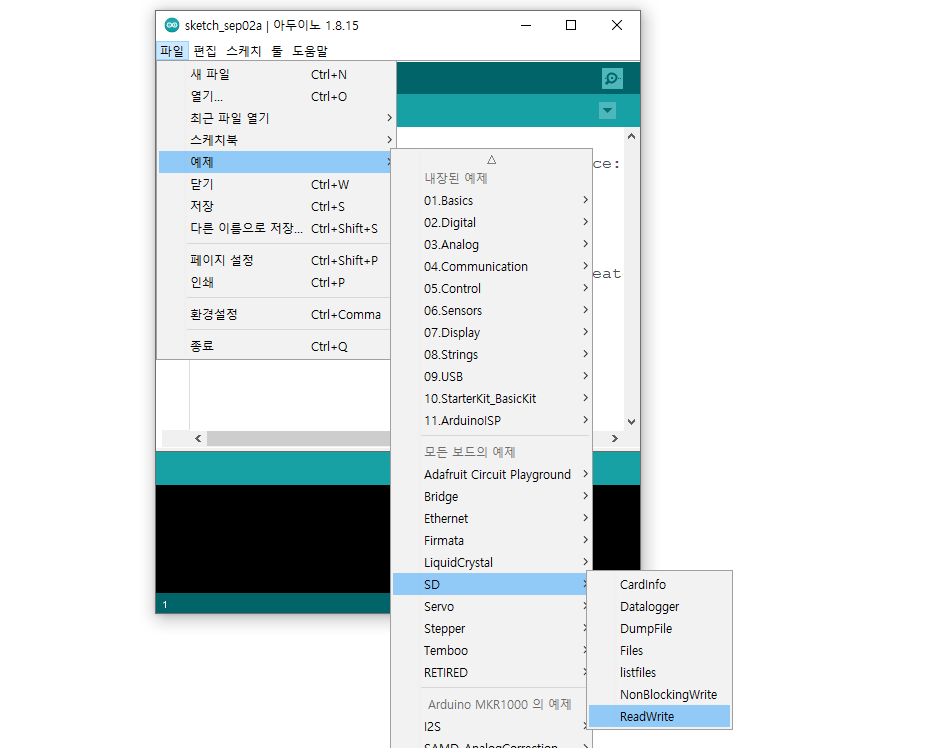
01. Arduino IDE에서 파일 -> 예제 -> SD -> ReadWrite로 이동한다.
02. 코드에서 "if (!SD.begin(4)) {"를 찾아 4를 6으로 변경한다.
CS(ChipSelect)가 MKR1000의 핀 6에 연결되어 있기 때문에 이것을 변경한다.

/*
  SD card read/write

  This example shows how to read and write data to and from an SD card file
  The circuit:
   SD card attached to SPI bus as follows:
 ** MOSI - pin 11
 ** MISO - pin 12
 ** CLK - pin 13
 ** CS - pin 4 (for MKRZero SD: SDCARD_SS_PIN)

  created   Nov 2010
  by David A. Mellis
  modified 9 Apr 2012
  by Tom Igoe

  This example code is in the public domain.

*/

#include <SPI.h>
#include <SD.h>

File myFile;

void setup() {
  // Open serial communications and wait for port to open:
  Serial.begin(9600);
  while (!Serial) {
    ; // wait for serial port to connect. Needed for native USB port only
  }


  Serial.print("Initializing SD card...");

  if (!SD.begin(6)) {
    Serial.println("initialization failed!");
    while (1);
  }
  Serial.println("initialization done.");

  // open the file. note that only one file can be open at a time,
  // so you have to close this one before opening another.
  myFile = SD.open("test.txt", FILE_WRITE);

  // if the file opened okay, write to it:
  if (myFile) {
    Serial.print("Writing to test.txt...");
    myFile.println("testing 1, 2, 3.");
    // close the file:
    myFile.close();
    Serial.println("done.");
  } else {
    // if the file didn't open, print an error:
    Serial.println("error opening test.txt");
  }

  // re-open the file for reading:
  myFile = SD.open("test.txt");
  if (myFile) {
    Serial.println("test.txt:");

    // read from the file until there's nothing else in it:
    while (myFile.available()) {
      Serial.write(myFile.read());
    }
    // close the file:
    myFile.close();
  } else {
    // if the file didn't open, print an error:
    Serial.println("error opening test.txt");
  }
}

void loop() {
  // nothing happens after setup
}
03 소스를 컴파일 한다.

04 MKR1000 보드에 코드를 업로드 한다.
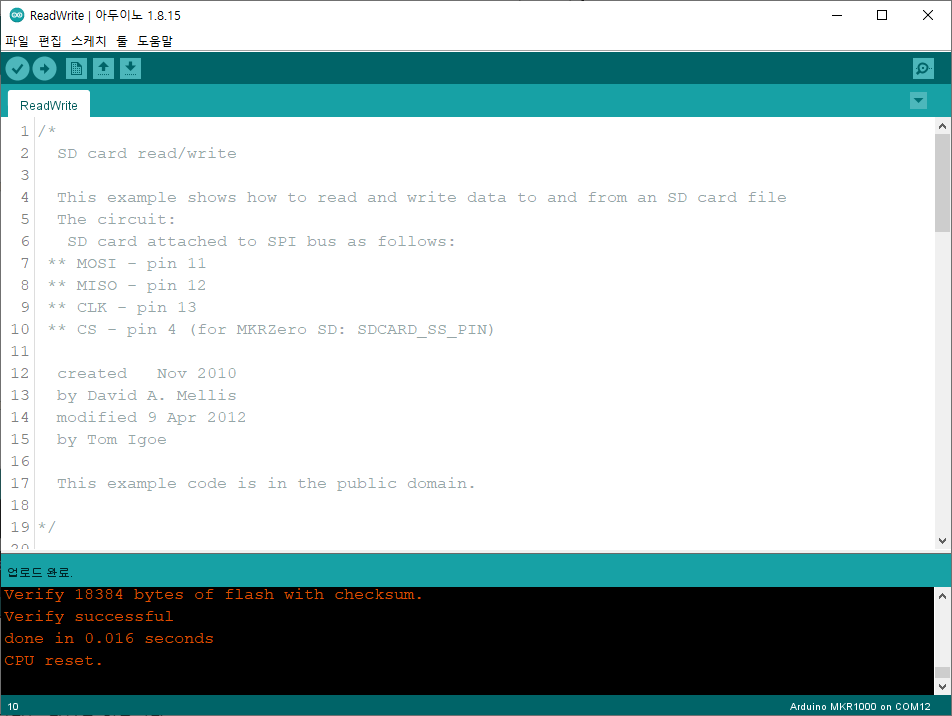
05. 직렬 모니터는 다음을 읽는다.

마무리
아두이노와 MicroSD Card Breakout board를 연결하고, 간단한 코딩으로 센서를 쉽게 실습할 수 있다.
모두의 아두이노 환경 센서 책
[모두의 아두이노 환경 센서] 책은 예스24, 인터넷 교보문고, 알라딘, 인터파크도서, 영풍문고, 반디앤루니스 , 도서11번가 등에서 구입할 수 있다. 이 책에서는 PMS7003, GP2Y1010AU0F, PPD42NS, SDS011 미세먼지 센서, DHT22 온습도 센서, MH-Z19B 이산화탄소 센서, ZE08-CH2O 포름알데히드 센서, CCS811 총휘발성유기화합물 TVOC, GDK101 방사선(감마선) 센서, MQ-131 오존(O3) 센서, MQ-7 일산화탄소, MICS-4514 이산화질소 센서, MICS-6814 암모니아 센서, DGS-SO2 아황산가스(SO2) 센서, BME280 기압 센서, GUVA-S12SD 자외선(UV) 센서, MD0550 기류 센서, QS-FS01 풍속 센서(Wind speed) 를 사용한다.
모두의 아두이노 환경 센서
아두이노와 센서로 내 건강을 지킬 수 있다!다양한 환경 센서를 실생활 프로젝트에 응용해보자!시중에 판매되고 있는 간이측정기도 센서로 값을 측정합니다. 똑같은 센서를 아두이노에 연결하
book.naver.com
'큐브셋 초소형 인공위성' 카테고리의 다른 글
| CubeSat - Adafruit Analog UV Light Sensor Breakout Board (0) | 2021.09.06 |
|---|---|
| CubeSat - OV5642 ArduCam Mini Module Camera Shield 5MP Plus (0) | 2021.09.06 |
| CubeSat - DS18B20 Digital Temperature Sensor (0) | 2021.09.05 |
| CubeSat - Sound Detector (SEN-12642) (0) | 2021.09.03 |
| CubeSat - RTC(Real Time Clock) Breakout Board (0) | 2021.09.02 |
| CubeSat HM3301-Grove - Laser PM2.5 Sensor (0) | 2021.09.02 |
| CubSet - How to Use Processing Software (0) | 2021.09.02 |
| CUBESAT - Arduino and the MKR1000 WiFi Microcontroller (0) | 2021.09.01 |


댓글